M365 Email – DMARC, DKIM, SPF Setup
Email is the most common attack vector used by threat actors to impersonate, phish, and send malicious attachments. You can take some control in your hands and add layers of protection to secure you business email. In this guide, we will walk you through the steps required to configure DMARC, DKIM, and SPF records into your DNS registrar and the impacts of each record.
DMARC, which stands for “Domain-based Message Authentication, Reporting & Conformance”, is an email authentication, policy, and reporting protocol.
DKIM (DomainKeys Identified Mail) is a protocol that allows an organization to take responsibility for transmitting a message by signing it in a way that mailbox providers can verify.
SPF (Sender Policy Framework) is an email authentication system that aids in identifying which mail servers are allowed to deliver emails for a specific domain.
Step 1 – Create your records
DMARC Record Generator: https://mxtoolbox.com/DMARCRecordGenerator.aspx
Type in your domain to access the generator options. In the first dropdown you have 3 options to choose (none, quarantine, and reject). We recommend the reject option as this configuration will tell mail servers to reject emails that could be potentially impersonation your domain and business.
Include the email address in step 2 and 3 to where you want DMARC reports to be sent to. Note: Make this a separate inbox because the reports can be very noisy (may flood your inbox if you set your primary email). These reports give you an idea of what unauthorized services or mail servers are attempting to send email on your behalf.
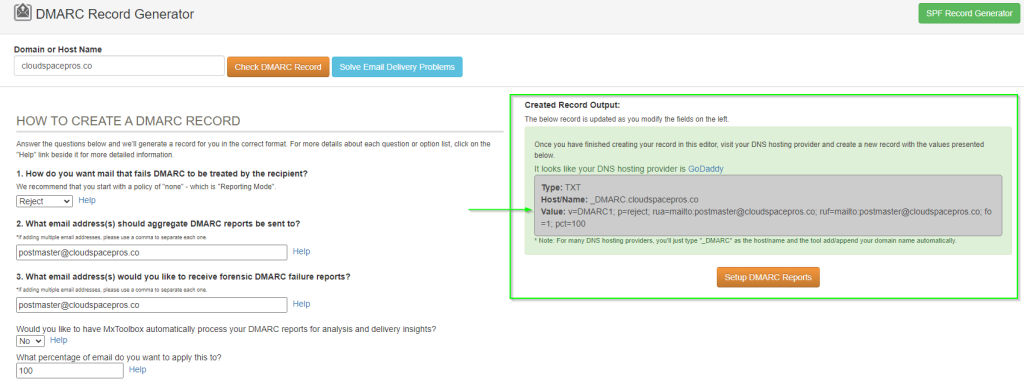
Save the generated record
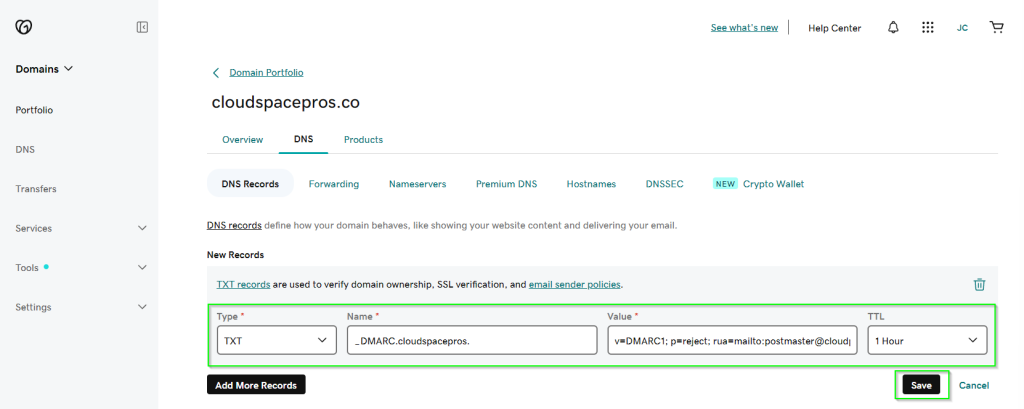
Example for cloudspacepros.co
Type: TXT
Host/Name: _DMARC.cloudspacepros.
Value: v=DMARC1; p=reject; rua=mailto:postmaster@cloudpspacepros.co; ruf=mailto:postmaster@cloudpspacepros.co; fo=1; pct=100
DKIM Records can be generated from the security admin page: https://security.microsoft.com/dkimv2
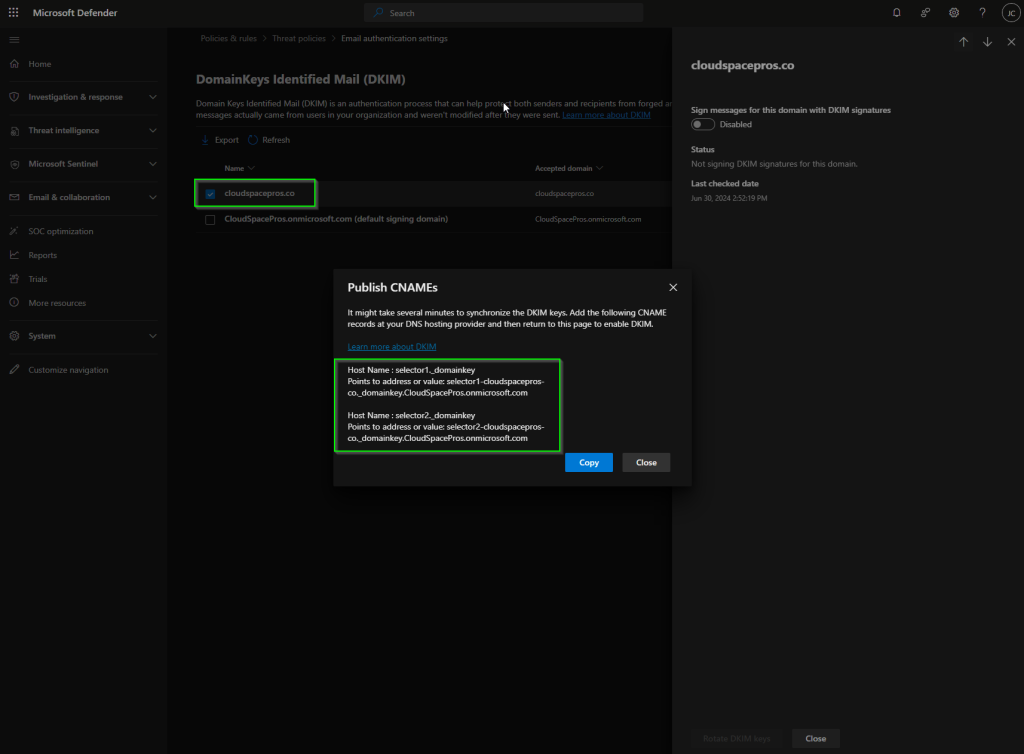
Type: TXT
Host/Name: selector1._domainkey
Value: selector1-cloudspacepros-co._domainkey.cloudspacepros.onmicrosoft.com.
Type: TXT
Host/Name: selector2._domainkey
Value: selector2-cloudspacepros-co._domainkey.cloudspacepros.onmicrosoft.com.
SPF Record Generator: https://admin.microsoft.com/adminportal/home#/Domains/
Your SPF record is generated by Microsoft Admin Center under domains.
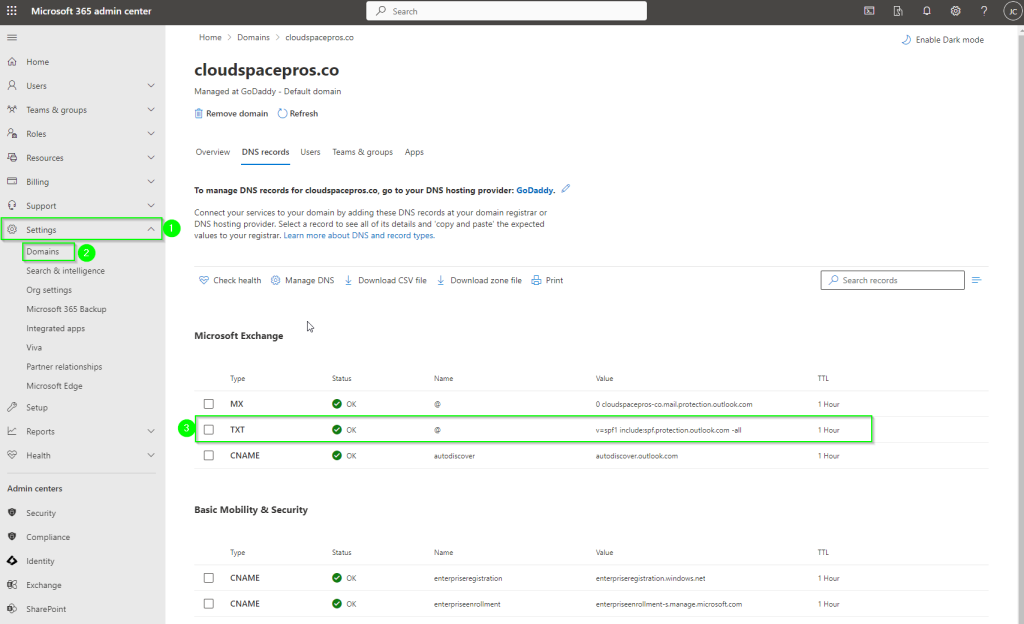
Type: TXT
Host/Name: @
Value: v=spf1 include:spf.protection.outlook.com -all
Step 2 – Update your DNS Records
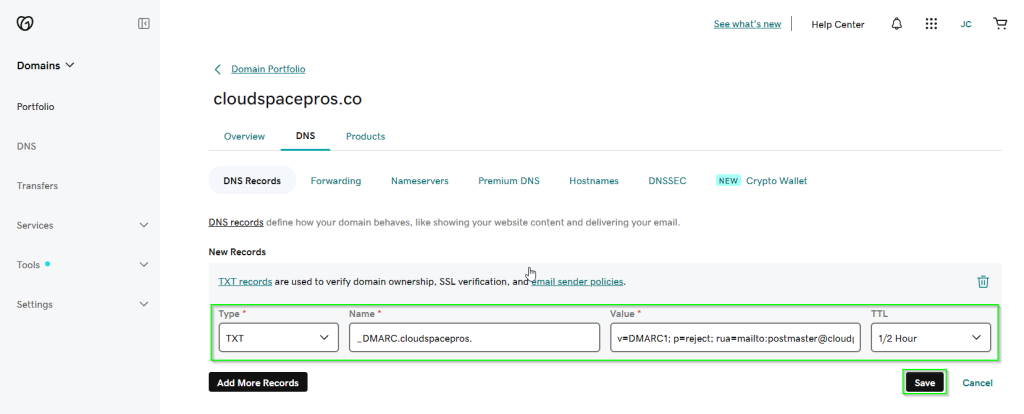
For this step, we will be using our DNS registrar, GoDaddy, for screenshots. You will update your records with you own registrar. Create the appropriate record types and set TTL (time to live) to 1 hour for all records (DMARC, DKIM, and SPF)
Step 3 – Validate your DNS Records
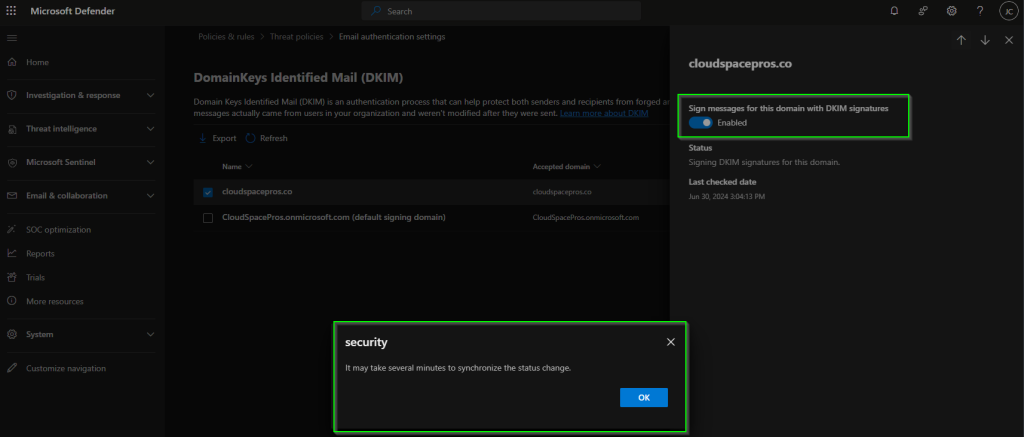
After entering in all your DNS records, you can go back to the DKIM page and enable DKIM signing as show in the screenshot below.
Note: DNS records can take up to 72 hours to propagate across systems.
Next we can validate all our records are in alignment by going to: https://www.learndmarc.com/.
At this site you will receive a prompt to send a test email to the following address. You can send “test” for both subject and body of email.
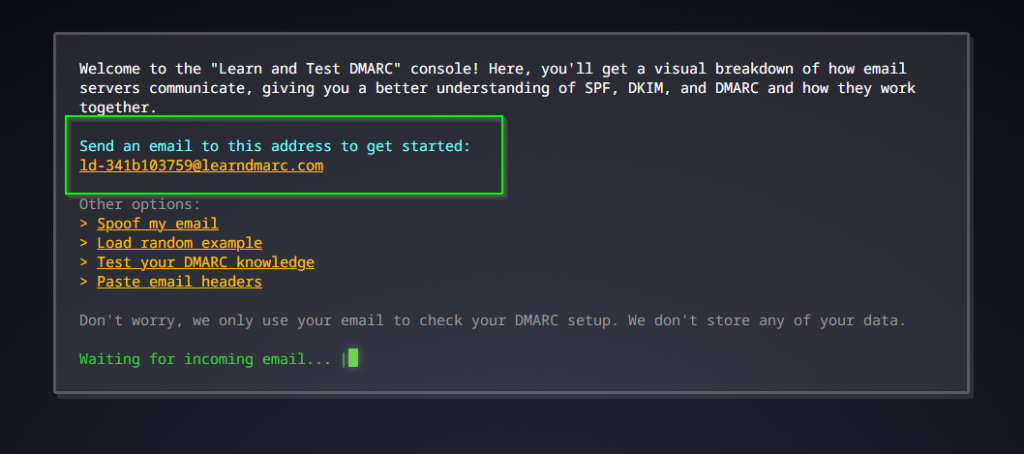
Once the site receives your test email, it will generate a report as the following screenshot validating your changes.

If you don’t feel comfortable making the changes on your own or have a more complex scenario, please reach out to support@cloudspacepros.co for a quick quote on services.


